Why Bathroom Mirrors Get Brown Spots: What Is Actually Happening & How to Prevent It
If you have ever looked at a bathroom mirror and noticed brown, rusty-looking patches creeping in from the edges, you are not looking at dirt. You are looking at a mirror slowly destroying itself from the inside out. These brown spots are one of the most common complaints we hear from homeowners and commercial facility managers alike. For a complete monthly inspection routine, safe cleaning recipes, humidity control strategies, and DIY prevention measures, see our Bathroom Mirror Maintenance & Desilvering Prevention Guide. What is frustrating is that no amount of front-side polishing, vinegar, or glass cleaner will make them disappear — because the damage is not on the surface. It is happening behind the glass, in the microscopic silver layer that makes a mirror reflective in the first place.
What Brown Spots Actually Are
A mirror is not a single material. It is a layered system built on clear soda-lime glass. Behind that glass sits a chemically deposited film of metallic silver — the reflective layer. On top of the silver, many mirrors have a thin copper-containing protective coating. The whole stack is then sealed by one or more layers of backing paint, which acts as a diffusion barrier against moisture and air. The visible brown spots are regions where this silver layer has partially corroded, chemically transformed, or detached from the glass substrate. The process is called desilvering, and once it starts, it is effectively irreversible at the consumer level.
From a materials-science perspective, the mirror remains highly reflective only while the silver film stays continuous and well adhered to the glass. Once the backing system develops cracks, porosity, or edge exposure, water and reactive gases reach the silver and initiate localized degradation that appears from the front as brown or dark spotting. The spots are not front-surface dirt. They are back-side corrosion features seen through the glass.
Why the Spots Look Brown Instead of Black
In early stages, the damage appears brown because the silver layer is only partially degraded. What you see is a mixed optical effect created by a combination of intact silver, corrosion products, exposed backing paint, and in some mirror designs, copper-rich regions beneath the damaged zone. As the degradation becomes more severe, the same areas may darken further and shift toward grey-black as the reflective metal is lost and more opaque corrosion products dominate.
The brown coloration is therefore an intermediate optical state rather than a single unique compound. Partially degraded silver, thin corrosion films, exposed backing paint, and copper-containing underlayers can all combine to produce translucent brown, tan, or rust-like areas before the region progresses to darker blackened tarnish. The observed color depends on corrosion product thickness, local roughness, remaining metallic silver coverage, and the optical contribution of layers beneath the damaged zone.
The Five Core Causes of Mirror Desilvering
1. Moisture Ingress from Steam and Condensation
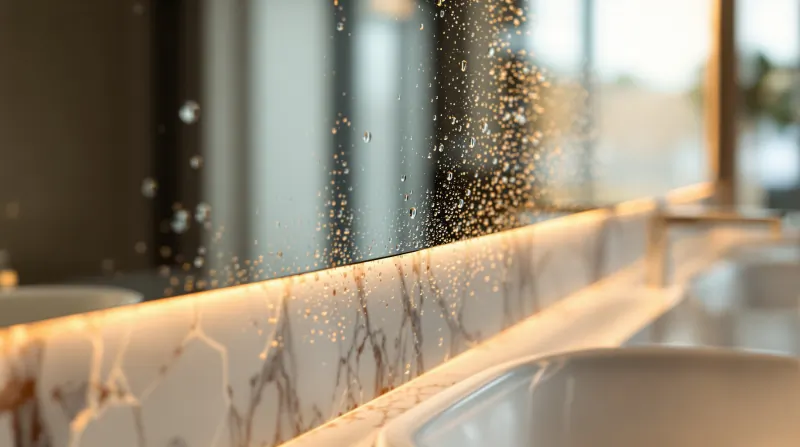
Bathrooms are the harshest environment for mirrors. Steam condenses on the mirror surface after every shower, and water collects at the bottom edge or seeps behind the glass through microscopic gaps. Repeated wet-dry cycles slowly eat away at the silver layer, especially near edges and corners where the protective backing is most vulnerable. Condensed water creates thin electrolyte films on or within defects in the backing system, which accelerates corrosion of both the silver and any protective metallic interlayer.
Warm humid air from showers condenses preferentially on cooler surfaces, and water then pools at bottom edges or penetrates behind the mirror through microscopic defects. Repeated wet-dry cycling also promotes differential expansion and contraction of glass, metal films, and organic coatings, which increases microcracking and interfacial stress over time. From a corrosion standpoint, the presence of a thin moisture film activates electrochemical processes that would not occur in dry conditions.
2. Harsh Cleaning Habits
One of the most common mistakes is spraying glass cleaner directly onto the mirror surface. The liquid runs down to the edges and seeps behind the glass, where it attacks the silver backing directly. Ammonia-based, bleach-based, and strong acidic or alkaline cleaners are particularly aggressive — they break down the protective paint, expose the silver layer, and accelerate corrosion. In extreme cases, incompatible cleaners can chemically attack the backing at the point of contact, producing irregular spot patterns that differ from natural edge creep but arise from the same basic loss of barrier integrity.
Ammonia is especially problematic because it complexes with silver and can actively dissolve the reflective layer. Over months of repeated use, an ammonia-based cleaner that consistently pools at the lower edge of a mirror can create a band of desilvering that looks like a dark tide mark creeping upward from the bottom. The correct technique is to spray cleaner onto a microfiber cloth first, then wipe the mirror — never let liquid stream into the edges.
3. Poor Installation and Edge Exposure
Edge regions are the most vulnerable parts of any mirror. When glass is cut, the multilayer system is exposed. Even a good factory coating is harder to maintain continuously at edges and corners, so degradation often starts there and propagates inward. Gaps behind the mirror or along the bottom edge trap moisture and cleaners right against the backing. Certain adhesives or acidic sealants can chemically attack the mirror coating from behind, causing irregular spots.
Improper installation materials are a silent killer. Certain acidic or solvent-heavy mastics and incompatible sealants can chemically damage the backing directly at the points of contact. A mirror mounted with the wrong adhesive may look perfect for the first year, then develop strange brown patches exactly where the adhesive touches the back — because the chemical has migrated through the paint and begun eating the silver. Always use mirror-safe, neutral-cure silicone or mechanical mounting systems.
4. Lower-Quality Mirror Backing
Not all mirrors are built the same. Thinner or cheaper protective paint, or traditional copper-based backing, tends to fail faster in humid rooms. Premium mirrors use copper-free backing systems and thicker, more resilient protective paints that resist moisture ingress for much longer. In Singapore's tropical climate — where relative humidity regularly exceeds 80% — the difference between a standard mirror and a bathroom-rated mirror can be the difference between five years and twenty years of spot-free performance.
The backing paint on the rear of the mirror is not decorative. It is a diffusion barrier and mechanical shield. If the paint becomes embrittled, scratched, chemically attacked, or poorly adhered, it opens pathways for moisture, oxygen, chlorides, and sulfur compounds to reach the metal layers underneath. A high-quality backing system with proper edge sealing is the single most important factor in mirror longevity outside of environmental control.
5. Sulfur-Driven Tarnishing and Silver Oxidation
Silver is particularly vulnerable to sulfur-containing gases, even at very low concentrations over long time periods. Once sulfur species diffuse through coating defects or edge pathways, silver converts into silver sulfide — a dark, non-reflective corrosion product strongly associated with tarnish and mirror darkening. Where the protective stack has failed, metallic silver can also oxidize in the presence of oxygen, moisture, and alkaline or contaminated surface films.
At a simplified level, the silver layer begins as metallic silver (Ag). When exposed to reactive conditions, it can be transformed into non-reflective compounds. The oxidation pathway converts silver to silver oxide (Ag₂O), while the sulfidation pathway converts it to silver sulfide (Ag₂S). Both reactions replace the reflective metallic phase with opaque corrosion products that destroy reflectivity. These processes are idealized, but they capture the essential point: the mirror's silver is being chemically consumed and transformed into something that cannot reflect light.
In Singapore, where humidity is consistently high and many bathrooms have limited ventilation, mirrors are under constant electrochemical stress. The combination of moisture, airborne contaminants, and warm temperatures creates ideal conditions for silver corrosion. Bathrooms near industrial or commercial areas may also be exposed to higher ambient sulfur compounds, accelerating tarnishing.
The Corrosion Process: How a Small Defect Becomes a Big Spot
Mirror corrosion is usually localized because contaminants enter through discrete pathways rather than uniformly across the entire back surface. Common pathways include cut edges, scratches, coating pinholes, failed sealant lines, and spots where cleaner or standing water is repeatedly allowed to wick behind the mirror. Once ingress begins, corrosion can spread laterally beneath apparently intact coatings — a phenomenon called underfilm propagation.
The progression typically follows this sequence. Stage one is an intact stack: glass, silver, protective layer, and paint, all sealed and performing. Stage two is a coating defect or edge exposure that allows water, oxygen, and sulfur gases to reach the metal layer. Stage three is localized corrosion and undercutting of the silver, creating a delaminated zone where the reflective layer is partially or fully consumed. Stage four is the visible front-side spot — reduced reflectance that appears as a brown or dark mark seen through the glass. This is why a small edge defect can eventually generate a larger irregular brown spot visible well inside the mirror field.
Can Brown Spots Be Fixed?
The honest answer for most homeowners is no. The silver layer is already eaten or peeled off in those patches; front-side polishes and cleaners only help with surface grime. For mass-market bathroom mirrors, replacement is usually cheaper and easier than any form of restoration. However, for antique mirrors or high-value custom pieces, professional resilvering is an option: the old coating is chemically stripped and a new silver layer is deposited, followed by fresh protective backing and paint. This is a specialist process performed by conservators and is not economical for standard bathroom mirrors.
For small areas where full replacement is not yet justified, cosmetic cover-ups can hide the damage temporarily. Stick-on mirror frames or trim can conceal ugly edge patches. Paint or tape on the front edge can disguise narrow bands of damage. These are quick DIY solutions, not real repairs — they do not stop the underlying corrosion from spreading. The only true fix is either professional resilvering or complete mirror replacement with a higher-quality, properly installed unit.
How to Prevent Brown Spots on New Mirrors
Prevention is the only strategy that actually works. Once desilvering starts, it is a one-way street. The good news is that a combination of environmental control, correct cleaning technique, and quality material selection can keep a bathroom mirror spot-free for decades.
- Run the exhaust fan during showers and for at least 10–15 minutes afterward, or open a window to flush humid air.
- Wipe condensation off the mirror and especially dry the bottom and side edges after steamy use. Water pooling at the edge is the fastest route to desilvering.
- Spray cleaner onto a microfiber cloth, not directly onto the glass, so liquid does not stream into the edges and seep behind.
- Use mild, pH-neutral glass cleaner. Avoid strong ammonia or bleach products on mirrors — they degrade the protective backing over time.
- Seal the gap between the backsplash and the mirror with clear, neutral-cure silicone so splashes cannot reach the backing.
- Consider a frame or trim that slightly overlaps the mirror edges to shield them from water and air exposure.
- Choose mirrors advertised as "copper-free backing" or "bathroom rated" for better resistance to moisture and corrosion.
- Ensure proper installation with mirror-safe adhesives or mechanical clips. Never use acidic mastics, solvent-heavy glues, or aggressive sealants that can attack the backing from behind.
- Avoid mounting mirrors inside shower enclosures where they are exposed to direct water spray, unless specifically rated for wet-area use with sealed edge protection.
When to Replace Your Mirror
If brown spots are appearing across more than 10–15% of the mirror surface, or if the spots are concentrated in the viewing area where they obstruct daily use, it is time to replace. When ordering a replacement, specify a copper-free, bathroom-rated mirror with proper edge sealing. The small additional cost compared to a standard mirror pays for itself many times over in longevity. In Singapore's climate, a cheap unsealed mirror may show edge creep within two to three years, while a quality bathroom-rated unit can remain spot-free for fifteen years or more with basic care.
For commercial facilities — hotels, gyms, office washrooms — mirror replacement should be part of the planned maintenance cycle. High-traffic bathrooms with constant humidity and aggressive cleaning regimens are the worst environment for standard mirrors. Specifying copper-free backing, proper edge sealing, and professional installation from the outset prevents the gradual degradation that turns a fresh bathroom fit-out into a maintenance headache within a few years.
The Bottom Line
Brown spots on bathroom mirrors are a visible macroscopic consequence of localized loss of continuity and adhesion in the silver-based reflector system. The root cause is rarely a single event; it is the cumulative effect of moisture exposure, contaminant ingress, edge vulnerability, and gradual failure of the protective coating architecture. From a homeowner's perspective, the message is simple: once the spots appear, cleaning will not help — focus on prevention when installing your next mirror. From a technical standpoint, the failure is a coupled degradation involving corrosion chemistry, diffusion through imperfect barriers, and mechanical breakdown of interfaces. Understanding both the practical prevention strategies and the underlying materials science is what separates a mirror that lasts two years from one that lasts twenty.
Need a mirror or glass installation quote?
See our glass installation services, then send panel photos and dimensions for a site-specific review.
View glass installation services